
Quick + Easy Christmas Stocking
by Haley Waxberg
This pattern is basically an oversized, easy-peasy, toe-up sock.
Back Story
Requests have been coming in for my Christmas Stocking pattern ever since I took a tumble 2 and a half weeks ago and was unable to type it up. Well, my poor little broken arms are on the mend and now that I've weaned myself off the narcotics (strictly for medical use) and I've got mental faculties back - for the most part.
A number of people have very discretely inquired about my motivations on this project, since I'm Jewish and all. Last year I celebrated Christmas with my boyfriend and his family, I got my very own stocking and I thought it was the cat's meow! The only thing that didn't appeal to me was the aesthetic, which seems to involve an unusual level of kitsch for WASPs (especially for my boyfriend's ultra fashionable mom). Before we even sat down for dinner I was planning a stocking for myself.
Now, this story isn't just about me and my secret and taboo jewy desire to carve out a piece of Christmas for myself. After my brother got married this summer my parents started socializing with his in-laws (better know as the 'outlaws'). Anticipating that Christmas would on their calendar this winter, I thought it would be very nice for them arrive to a warm reception with their very own, personalized stockings. All of this was easy, until I started researching what a stocking should look like. Everyone had a different description and each was Canonical (as in written in blood, sweat, tears, and then etched stone). So this is a Jewish girl's take on how she thinks a Christmas stocking can look great. It's like a big version of the Whos's stockings from "How the Grinch Stole Christmas." If you find it too big you can either make it shorter or stuff the toe with tissue paper. That said, I think that my stocking is so nice that you are going to want to replace your mungy old things, or convert. ;-)
Size
7" wide
22" long
Materials
10mm-16" circular needles (or 5 double pointed needles or a 36" long circular needle for magic loop)
1 skein Cascade Magnum or Brown Sheep Burly Spun
3 Jumbo Locking Stitch markers
10mm crochet hook (for cast on)
scrap yarn, super bulky
jumbo tapestry needle
Optional Materials for Applique
Felting needles
Felting mat or dense sponge
Lamb's Pride Bulky, Creme
Straight pins
Gauge
10 sts & 12 rows = 4"/10cm
Abbreviations
k knit
k2tog knit 2 sts together
M1 make 1: lifted stitch increase
p purl
p2tog purl 2 sts together
PM place marker on the needle
R row or round
sl slip (the stitch)
sl m slip marker
st/s stitch/es
w & t wrap & turn (short rows)
Techniques
Provisional Cast-on
Short Rows
Short Row Heel Tutorial (how to make the sts pretty)
M1 Increase
I-Cord
Needle Felting
Directions
Toe
Using scrap yarn and a provisional cast-on technique, cast on 12 sts.
R1: P 1 row.
R2: K until 1 st remains, w & t.
R3: P until 1 st remains, w& t.
R4: K until 2 sts remain, w & t.
R5: P until 2 sts remain, w& t.
R6: K until 3 sts remain, w & t.
R7: P until 3 sts remain, w& t.
R8: K until 3 sts remain, unwrap next st & knit the wrap together with the st, w & t next st. (to make the decrease look prettier you should manually switch the position of the stitch and the wrap/s so that the stitch is closer to the exterior of the stocking and then work them together)
R9: P until 3 sts remain, unwrap next st & purl the wrap together with the st, w & t next st.
R10: K until 2 sts remain, unwrap next st & knit the wraps together with the st, w & t next st.
R11: P until 2 sts remain, unwrap next st & purl the wraps together with the st, w & t next st.
R12: K until 1 st remains, unwrap next st & knit the wraps together with the st, w & t next st.
R13: Sl 1st st, p until 1 s remains, unwrap next st & purl the wraps together with the st, w & t next st.
R14: Sl 1st st, k to end of row, pm #2,pick up & knit st. s from provisional cast-on, pm #1. Marker # 1 is the start of the round.
R15: knit.
R16: M1, k to next marker, sl m, M1, k to next marker. (26 sts)
R17: knit.
R18: K to marker, M1 sl m, k to marker, M1, sl m. (28 sts)
R19: K7, place marker #3, knit to end of round. Change colours at marker #3, Marker # 3 is beginning and end of round.
Foot
Continue to knit in the round until piece measures 8" from edge of toe.
Heel
R1: K to 1 st before marker #2, w & t.
R2: P to 1 st before marker #1, w & t.
R3: K to 2 sts before marker #2, w & t.
R4: P to 2 sts before marker #1, w & t.
R5: K to 3 sts before marker #2, w & t.
R6: P to 3 sts before marker #1, w & t.
R7: K to 3 sts before marker #2, unwrap next st & knit the wrap together with the st, w & t next st.
R8: P to 3 sts before marker #1, unwrap next st & knit the wrap together with the st, w & t next st.
R9: K to 2 sts before marker #2, unwrap next st & knit the wraps together with the st, w & t next st.
R10: P to 2 sts before marker #1, unwrap next st & knit the wraps together with the st, w & t next st.
R11: K to 1 st before marker #2, unwrap next st & knit the wraps together with the st, w & t next st.
R12: Sl 1st st, P to 1 st before marker #1, unwrap next st & knit the wraps together with the st, w & t next st.
Heel Gusset
R13: Sl 1st st, k to marker #2, remove marker, pick up & knit 2 sts in the gap, pm, k to marker #1, pick up & knit 2 sts in the gap, k to marker #3.
Leg
Knit until leg measures 17" from base of heel (measured from 1" in).
Next Row: Shift marker #3 1 st to left, then cast off until 3 sts remain, k the 3 sts.
Working on the 3 remaining sts, make an I-Cord for 5".
Next Row: k2tog, k1, lift 1st st over 2nd st. Cut yarn, leaving about 8" for seaming.
Finishing
Wave in ends.
Sew I-cord to cast off edge of stocking to form a loop.
Applique
To add applique, pin yarn bulky weight yarn in place, the way you want it. Place felting mat in place inside the stocking. Poke the yarn in place with the felting needle (only into the section covered by the mat). Move the mat around as needed.

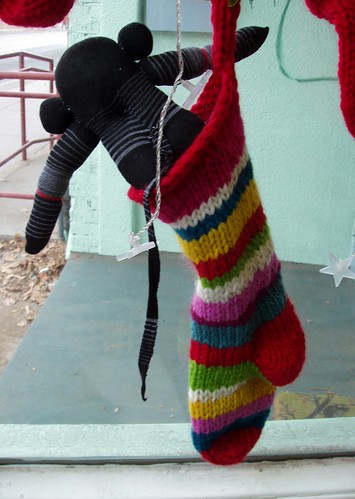
Materials for Striped Stocking A
Cascade Magnum in:
- Red 9431
Brown Sheep Burly Spun in:
- BS23 Fuchsia
- BS120 Limeade
- BS78 Aztec turquoise
- BS38 Lotus Pink
Brown Sheep Lamb's Pride Bulky:
- M145 Spice
- M187 Turquoise Depths
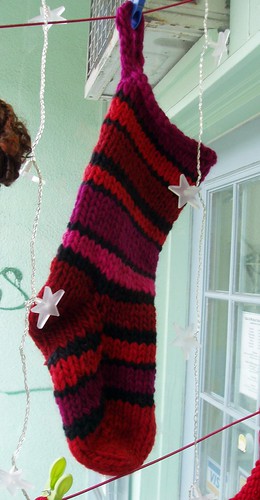
Materials for Striped Stocking B
Brown Sheep Burly Spun in:
- BS23 Fuchsia
- BS05 Black
- BS38 Lotus Pink
- M145 Spice
- M81 Red Baron
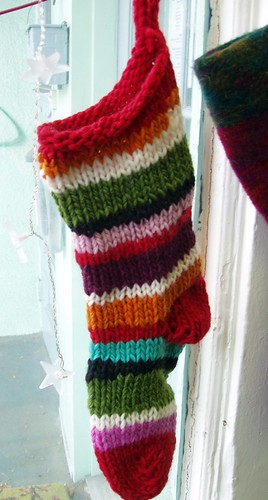
Materials for Striped Stocking C
Cascade Magnum in:
- Red 9431
- BS23 Fuchsia
- BS120 Limeade
- BS78 Aztec turquoise
- BS38 Lotus Pink
- BS10 Creme
- BS155 Lemon Drop
- Spruce (discontinued, sub M16 Seafoam)
- M105 RPM Pink
Materials for Striped Stocking D
Brown Sheep Burly Spun in:
- BS180 Ruby Red
- BS05 Black
- Bs10 Creme
- BS191 Kiwi
- M105 RPM Pink
- M187 Turquoise Depths
- M28 Chianti
- M22 Autumn Harvest
- M34 Victorian Pink
2 comments:
I love it! Knitting ADD hit me earlier this week and, as I was itching to cast on something new today, this is perfect! If it goes quickly enough, this might become the gift I give everyone else this year. Thank you, and hope your recovery goes well!
I love these stockings, though they are well beyond my (beginner!) ability. My kids (Jewish like me and h) love my mother-in-law's (not Jewish) Christmas stockings and look forward to getting them every year.
Post a Comment